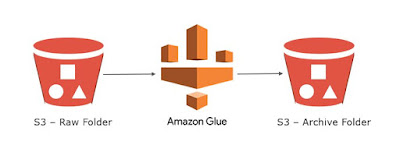
Today we will learn on how to move file from one S3 location to another using AWS Glue
My personal journey in this world full of data and continuous efforts to provide solutions to some of the technical challenges i've encountered so far.
Showing posts with label python. Show all posts
Showing posts with label python. Show all posts
Ingest data from external REST API into S3 using AWS Glue
Today we will learn on how to ingest weather api data into S3 using AWS Glue
Steps:
- Create a S3 bucket with the below folder structure:
- S3BucketName
- Libraries
- Response.whl
- Download python response library (in .whl format) and save in the Libraries folder within S3
- Download link: https://pypi.org/project/requests/#files
- Sign up in Openweathermap website and get the api key to fetch the weather data
- Create a new Glue ETL job
- Type: Python Shell
- Python version: <select latest python version>
- Python Library Path: <select the Response.whl library path>
- This Job runs: <A new script to be authored by you>
- Click Next
- Click "Save job and edit Script"
- Import response library
- import boto3 library for saving in S3 bucket
- Write the code to ingest data
- Run the glue job
- View the glue job results
- Job run status = Succeeded
- Verify if the data is saved in S3 bucket
- Download the saved json file from S3 and check if it is correct
- You are done. Cheers!
Upload a file to Azure Blob Storage (ADLS Gen 2) using Python
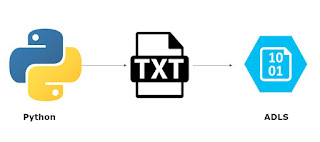
Today we will learn on how to upload a csv file to Azure Blob Storage (ADLS) using Python
Steps:
- Create a file to be uploaded to Azure Storage
- Create a python script
- Install Azure package from pip
- pip install azure-storage-file-datalake
- Import the azure module
- import os, uuid, sys
- from azure.storage.filedatalake import DataLakeServiceClient
- from azure.core._match_conditions import MatchConditions
- from azure.storage.filedatalake._models import ContentSettings
- Create a connection to your Azure storage in the python script
- service_client = DataLakeServiceClient(account_url="{}://{}.dfs.core.windows.net".format("https", 'Storage_account_name'), credential='Storage_Account_Key')
- Specify the container name
- file_system_client = service_client.get_file_system_client(file_system="your_container_name")
- Specify the directory in your Azure storage
- directory_client = file_system_client.get_directory_client("my-directory")
- Create a blank txt file
- file_client = directory_client.create_file("uploaded-file.txt")
- Read the txt file from your local computer
- append the data into the txt file (by calling the append_data() function) created in the Azure storage
- local_file = open("C:\\Users\\xxxxxxx\\Desktop\\testFile.txt", 'r')
- file_contents = local_file.read()
- file_client.append_data(data=file_contents, offset=0, length=len(file_contents))
- file_client.flush_data(len(file_contents))
To know more about the File upload operations, visit Microsoft Site
Upload file to a S3 bucket using Python and Selenium automation testing framework
Today we will learn on how to upload a file to a S3 bucket using Selenium automation testing framework with python
Scenario: When you run the python script for selenium, the following steps will be executed:
- A web browser will open and at the background a test file will be uploaded to S3
- Web browser will then navigate to Amazon account > S3 bucket
- Web browser will verify whether the file has been uploaded or not
Steps:
- Login to your AWS account and go to S3
- Create an empty S3 bucket
- Install boto3 library for python
- you can use either commands in terminal:
- pip install boto3
- easy_install boto3
- Now create a selenium framework script using python
- Import the boto3 library in the script
- Specify your client key and secret key
- Specify local file path
- Specify a S3 file name that you want to give to this new file when uploaded in S3
- Create a boto3 client object:
- s3 = boto3.client('s3',aws_access_key_id=ACCESS_KEY, aws_secret_access_key_id=SECRET_KEY))
- Use the below function to upload the file to S3:
- s3.upload_file(local_file_path, bucket, s3_file_name_to_overwrite)
- Run the script
- After running the script, go to AWS S3 bucket and you will find the new file uploaded.
- You are done :)
Note: the script shared above is only for uploading the file in S3, you have to add additional steps in the python selenium framework (after the upload code) to verify, whether, the file has been successfully uploaded in S3 or not.
GCP Cloud - Capture Data Lineage with Airflow
Today we will learn on how to capture data lineage using airflow in Google Cloud Platform (GCP)
Create
a Cloud Composer environment in the Google Cloud Platform Console and run a
simple Apache Airflow DAG (also called a workflow).
An Airflow DAG is a collection of
organized tasks that you want to schedule and run. DAGs are defined in standard
Python files.
- Enable Cloud composer API in GCP
- On the settings page to create a cloud composer environment, enter the following:
- Enter a name
- Select a location closest to yours
- Leave all other fields as default
- Change the image version to 10.2 or above (this is important)

- Upload a sample python file (quickstart.py - code given at the end) to cloud composer's cloud storage
- Click Upload files
- After you've uploaded the file, cloud composer adds the DAG to Airflow and schedules the DAG immediately. It might take a few minutes for the DAG to show up in the Airflow web interface.
- Open the Airflow web server to see the logs, view metadata, etc.
- To see lineage, click: Data Profiling >Ad Hoc Query
- Data Lineage is captured in the xcom table
- Execute the following SQL Statement to view Lineage:
- You are Done.
You can also integrate Airflow with Apache Atlas.
Airflow can send its lineage metadata with Apache Atlas. For this, you need to enable the atlas backend and configure it properly, e.g: in you airflow.cfg (configuration):
[lineage]
backend = airflow.lineage.backend.atlas.AtlasBackend
[atlas]
username = <my_username>
password = <my_password>
host = <host>
port = 21000
Note: Please make sure to have the atlas client package
installed.
- Spin up a GCP compute engine instance (Linux OS)
- Open SSH
- Install Java
- sudo apt install openjdk-8-jdk
- Install Maven
- sudo apt-get install maven
Python file code for Lineage Testing (quickstart.py):
import airflow
from
airflow.operators.bash_operator import BashOperator
from
airflow.operators.dummy_operator import DummyOperator
from
airflow.lineage.datasets import File
from airflow.models import
DAG
from datetime import
timedelta
FILE_CATEGORIES =
["CAT1", "CAT2", "CAT3"]
args = {
'owner': 'airflow',
'start_date':
airflow.utils.dates.days_ago(2)
}
dag = DAG(
dag_id='example_lineage', default_args=args,
schedule_interval='0 0 * * *',
dagrun_timeout=timedelta(minutes=60))
f_final =
File("/tmp/final")
run_this_last =
DummyOperator(task_id='run_this_last', dag=dag,
inlets={"auto": True},
outlets={"datasets": [f_final,]})
f_in =
File("/tmp/whole_directory/")
outlets = []
for file in
FILE_CATEGORIES:
f_out = File("/tmp/{}/{{{{
execution_date }}}}".format(file))
outlets.append(f_out)
run_this = BashOperator(
task_id='run_me_first', bash_command='echo
1', dag=dag,
inlets={"datasets": [f_in,]},
outlets={"datasets": outlets}
)
run_this.set_downstream(run_this_last)
Labels:
Airflow,
Apache Airflow,
Apache Atlas,
Data lineage,
GCP,
python
Subscribe to:
Posts (Atom)


