Showing posts with label ADLS. Show all posts

Upload a file to Azure Blob Storage (ADLS Gen 2) using Python

Today we will learn on how to upload a csv file to Azure Blob Storage (ADLS) using Python 
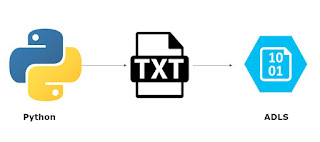
Steps:
  • Create a file to be uploaded to Azure Storage
  • Create a python script
    • Install Azure package from pip
      • pip install azure-storage-file-datalake
    • Import the azure module
      • import os, uuid, sys
      • from azure.storage.filedatalake import DataLakeServiceClient
      • from azure.core._match_conditions import MatchConditions
      • from azure.storage.filedatalake._models import ContentSettings
    • Create a connection to your Azure storage in the python script
      • service_client = DataLakeServiceClient(account_url="{}://{}.dfs.core.windows.net".format("https", 'Storage_account_name'), credential='Storage_Account_Key')
    • Specify the container name
      • file_system_client = service_client.get_file_system_client(file_system="your_container_name")
    • Specify the directory in your Azure storage
      • directory_client = file_system_client.get_directory_client("my-directory")
    • Create a blank txt file
      • file_client = directory_client.create_file("uploaded-file.txt")
    • Read the txt file from your local computer
    • append the data into the txt file (by calling the append_data() function) created in the Azure storage
      •  local_file = open("C:\\Users\\xxxxxxx\\Desktop\\testFile.txt", 'r')
      •  file_contents = local_file.read()
      •  file_client.append_data(data=file_contents, offset=0, length=len(file_contents))
      •  file_client.flush_data(len(file_contents))
    • Go to your Azure blob storage and view the results


To know more about the File upload operations, visit Microsoft Site

Programmatically upload a file to Azure Blob Storage (ADLS) using C# .Net

Today we will learn on how to programmatically upload a file to Azure Blob Storage (ADLS) using C# .Net
Steps:
  • Create a test file called "sample-blob" and write "Test" inside the file.
  • Open visual studio and create a new console application
  • Install Azure storage blob client library for .Net using Nuget:
    • dotnet add package Azure.Storage.Blobs
  • Create a C# class for uploading the file to blog
    • Import the Azure.Storage.Blobs library
    • Create a reference to the container where you want the file to be uploaded
    • Get a reference to the blob (file name)
    • call the blog.upload(local_file_path) function by the path to the file that you want to upload to Azure blob
    • Now, run the script.
    • Once the script finishes execution, go to Azure blob and check if the file has been uploaded or not
    • Open the file to see if the file contains "test" word in it or not.
                  
    • You are done


Centralize logs with Azure Monitor and Storage account (ADLS)

Today we will learn on how to Send the logs of each resource within Azure to Azure Monitor as well as Azure Storage (ADLS)
  • If you want to store the logs for longer duration, you can use Azure Data Lake (ADLS) for logs storage
  • If you want to view the logs of each resource/activity within Azure on the fly, you can send each resource's logs to Azure Monitor (a centralized hub to viewing logs)

Today we will store the logs of Azure data factory in ADLS as well as view them in Azure Monitor.

Steps to be performed at Data factory side and Azure Monitor:
  • Go to your data factory
  • click Diagnostic settings
  • Configure the diagnostic settings
  • Select "Send to Log Analytics"
    • This will send the logs to Azure Monitor
    • Specify the subsctiption and log analytics workspace
      • If you haven't created a log analytics workspace, create one.
  • Select "Archive to a storage account"
    • This will send the logs to ADLS
    • Specify the subscription and Storage account where you want the logs to be stored
    • If you specify this option, then you also have to specify the retention (in days) for logs
  • Select what type of logs you want to be stored
    • Tick mark all the logs.
  • Now go to Azure Monitor to view the logs
    • Type "Monitor" in the search bar
  • Select a scope
    • Select what resource's logs you want to view
    • Select the Metric you want to view
    • Select the Aggregation
    • You are done. 
    • The specific metric will be shown
Steps to see the logs in the Azure Storage (ADLS):
  • Install Azure Storage Explorer in your computer.
    • This utility will let you view your ADLS accounts and the data inside
    • Configure the storage to your storage account
  • Navigate to your Storage account
    • Here, you will see different containers created automatically for data factory logs
      • Pipeline runs
      • Trigger runs
      • activity runs
    • You will also see a $logs container created that will store all the logs for all the resources day wise in a folder

AzCopy - copy files from on-premise location to Azure Blog Storage (ADLS)

Today we will learn on how to copy files from on-premise to Azure Blob Storage (ADLS) using AzCopy


Pre-Requisite:
  • Download AzCopy utility from here  (microsoft site)
  • Install the AzCopy.exe in the machine that you'll be using to run the copy commands
  • Open the Azcopy command line utility and start writing the commands
Steps to deploy AzCopy Script to copy Images:
  1. Authenticate a user identity:
    1. Use the script in CMD to authenticate your identity.


    • Replace the <tenant-id> placeholder with the tenant ID of the organization to which the storage account belongs. To find the tenant ID, select the Azure Active Directory > Properties > Directory ID in the Azure portal.

    • Eg.: azcopy login --tenant-id = 5dasda9fa7da79da7-abec-4505-81ea6-8csda2


Once you enter the command "azcopy login --tenant-id = <tenant-id>, it will return a code and URL of a website.
  • Open the website
  • Provide the code
  • Click Next button
  • A Sign-in window will appear.
  • Sign-in using your azure account credentials
  • After you've successfully signed in, you can close the browser window and begin using AzCopy
To login using other means (service principle or User assigned identity), get the appropriate command from the below link:
      
2. To copy files from On-prem location to ADLS, use the below command:
  • azcopy sync " <Select-folder-path>" "https:// <storage-account-name>/ <container-name> <SAS Token>" --recursive=true 
Note: Please use double quotation for file path if you’re using Windows machine. 
  • AzCopy sync will start a non-stop copy process where AzCopy will keep on copying the files unless manually terminated.
  • If you just want to just trigger the process one time, use the copy parameter instead of sync.
Copy single file:
  • azcopy cp "/path/to/file.txt" "https://[account].blob.core.windows.net/[container]/[path/to/blob]?[SAS]"
Copy entire directory:
  • azcopy cp "/path/to/dir" "https://[account].blob.core.windows.net/[container]/[path/to/directory]?[SAS]" --recursive=true
To get the SAS token:
  • Go to your storage account from Azure Portal
  • Click Shared Access Signature 
  • Copy the SAS token


Informatica Cloud - Copy data from SQL to Azure ADLS

Today we will learn on how to load data from SQL database to Azure ADLS as file

  1. Purchase and enable Microsoft Azure data lake (ADLS) Gen 2 connector for Informatica 
  2.  Register your informatica app with Azure AD
    1. This app will act as a service principal 
    2. Note down the client secret and client ID
    3. Give appropriate permissions to Informatica app (in Azure)
      • Storage blob data contributor
      • Internet access to Informatica to talk to Azure ADLS
  3. Create an Informatica connection to Azure ADLS Gen 2
    1. Enter the following information:
      • Client ID
      • Client Secret
      • Tenant ID
      • Account Name (Azure Storage account name)
      • File System Name (Container name within a storage account)
      • Directory Path: /   (leave as default)